|
|
 |
||||||||||||||||||||
 |
||||||||||||||||||||
|
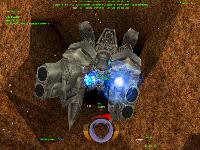
Click here to see this page in German. In 1999, Descent 3 appeared which was a small revolution in the Descent series, and this alike in multiple respect. For the first time, the player was able to leave the narrow mine tunnels and fight under free sky against robots. For the first time, the game offered support for 3D-cards. Optically, it made a by far better impression than its two predecessors. Since the 360 degrees liberty of Descent causes many players problems, there was also for the first time a training mission at the beginning of the game. Here, the player was instructed into the elementary navigation techniques. From the predecessor Descent 2 was the guidebot taken which finds the next target as well as powerups, energy and robots. In Descent 2, the guide-bot had to be released by shooting on the cell walls of its prison. In Descent 3, however, it was inside the ship and was dispatched by the player into the environment by pressing the F4 key. With the same key it could be taken back again. Because of the guide-bot, it wasn’t necessary anymore to activate the “map” of the game with the tab-key. It still existed, but had experienced a great renovation. Instead of simple graphics, one saw a real three dimensional view of the area. Unlike Descent 1 and 2, where always only the reactor or a gigantic final opponent had to be conquered, in Descent 3 the missions had become by far more varied. In every of the 15 levels waited a completely different task for the player. In one level, for example, you had to defend at least three reactors against robots under time pressure. In another, you had to find your way through an underground system and not be destroyed by fast trains. On the way to the PTMC headquarter, you had to fight your way through street canyons and a canalisation system. Although Descent 3 impressed by an even more extraordinary level design than its predecessors, the game principle seemed not as much revolutionary as it was the case with Descent 1 and 2. Many shooter fans prefered titles that there easier to handle, like Quake 3, Unreal or Half-Life. They believed that they would offer more “action”. Moreover, the requirements that Descent 3 made on the hardware, were relatively high for a PC of the year 1999. For that reason, Descent 3 was almost only welcomed by confirmed Descent fans euphorically. However, because of the thrilling gameplay, the excellent graphics and the atmospheric soundtrack it is surely still worth a purchase. Shortly after Descent 3, Mercenary was published. This expansion pack offered 7 new singleplayer missions plus 4 multiplayer missions. In order to play it, however, the full version of Descent 3 was necessary. Here is the method how Descent 3 inclusive Mercenary should be installed in Windows XP:
The double installing of Mercenary ist necessary in order to avoid the following error message when starting Mercenary: “Could not load MERC1.D3L” You can download an unofficial patch 1.5 for Descent 3 from this site. However, it is not recommendable to use it with Mercenary. Descent 3 looks often quite awful on TFT displays. This is caused by the fact that they can only display one resolution in optimal quality. For 17- or 19-inch displays it is 1280x1024. Owners of such TFT displays should extend the command line in setup menu by the following parameters (Descent 3 Launcher -> Setup -> Misc. -> Optional D3 command line parameters): -width 1280 -height 1024 -aspect 1.25 After you have started the game for the first time, you have to increase the picture with the ‘+’ key. It is next to the backspace (<-) key. Links to Descent 3 pages:
Cheat-Codes for the full version of Descent 3 (see also the tips from Descent-3.com!):
Tips:
<- previous page I next page ->
|
||||||||||||||||||||